Resources
The resources view in PQFORCE provides a comprehensive overview of all employees registered within your PQFORCE system.
Workspace
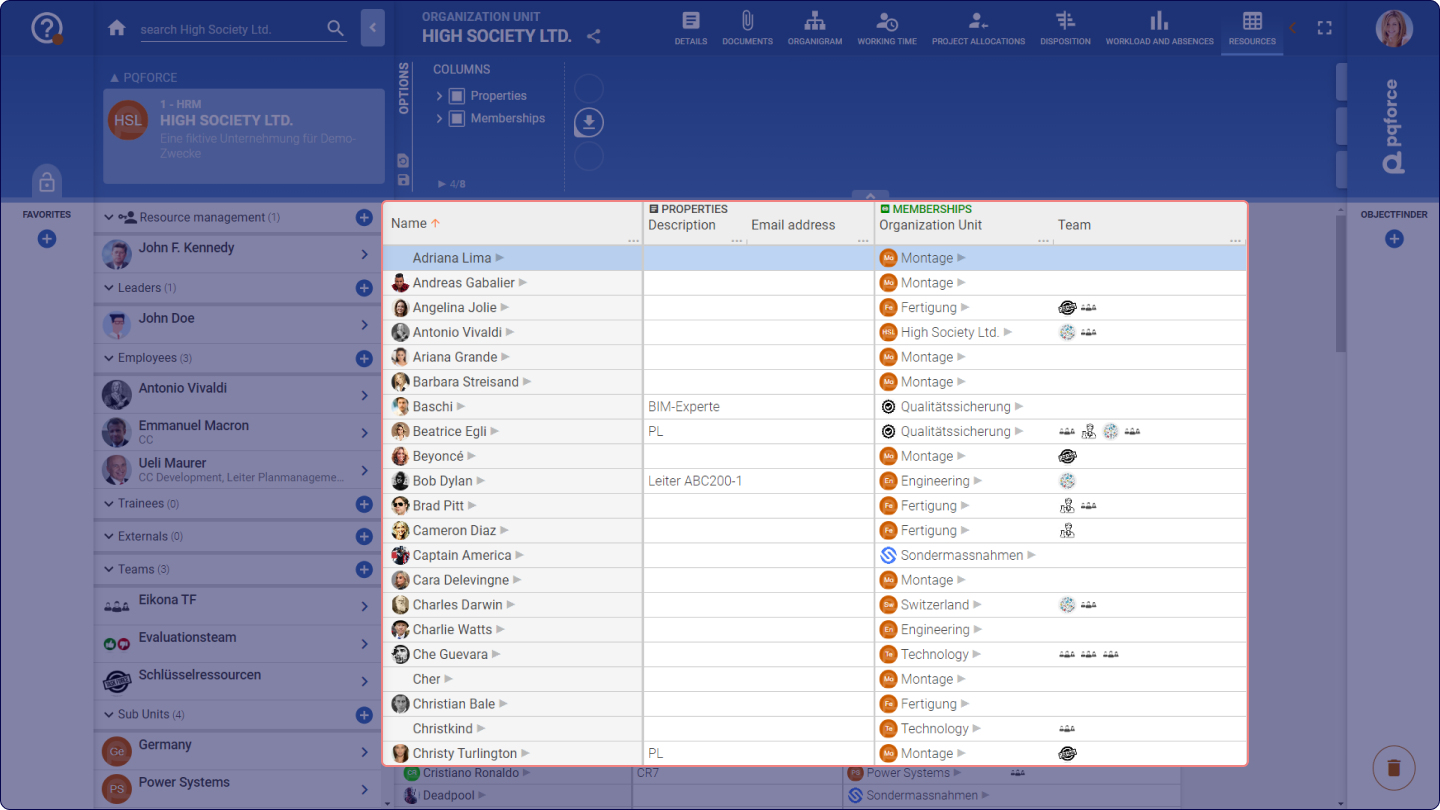
The workspace presents a table layout with three main columns, each containing essential information about individual employees.
Name:
-
This column lists all resources created in the system.
-
By clicking on the Arrow icon
![]() adjacent to an employee's name, a separate window opens, displaying the employee's profile.
 adjacent to an employee's name, a separate window opens, displaying the employee's profile.
PROPERTIES:
-
Description: This field provides a brief description of each employee, as set up in the DETAILS section.
-
Email: This field showcases the email address associated with each employee.
-
Abbreviation: Unique abbreviation of the employee’s name
-
Education: Information about degrees
MEMBERSHIPS:
-
Department: Indicates if an employee is a member of any department within PQFORCE. Clicking on the arrow icon next to the Department heading opens a separate window, revealing the department's profile.
-
Team: Displays whether an employee is part of any specific team. Clicking on the team heading opens a new window with the team's profile.
-
Skill (this option is available for editions higher than PQFORCE Smart) displays the information whether a resource
Column Sorting and Filtering
It is possible to filter the columns to arrange the visualization of the table according to preferences:
- By clicking on the Sort icon
![]() , represented by an arrow, located at the top, the data in the selected column can be arranged in alphabetical order.
 , represented by an arrow, located at the top, the data in the selected column can be arranged in alphabetical order.
OPTIONS
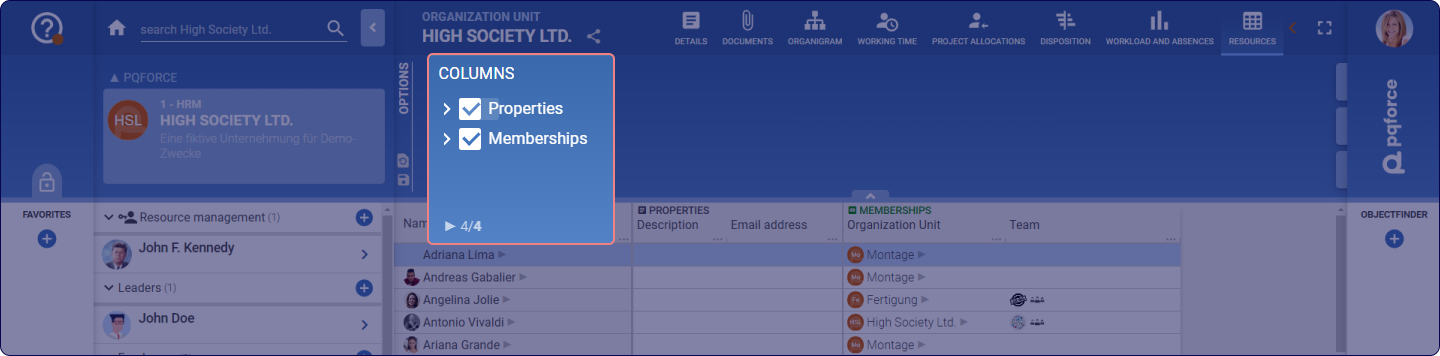
The Options Area offers features to customize the visualization of the main table within the workspace.
COLUMNS
This section includes two box-shaped icons:
-
Properties: Enables the display of the PROPERTIES column in the table below. The entire section can be toggled by clicking on the column header, or the arrow on the right can be used to show or hide the individual nested items.
-
Memberships: Enables the display of the MEMBERSHIP column in the table below. The entire section can be toggled by clicking on the column header, or the arrow on the right can be used to show or hide the individual nested items.