Quickstart Guide
Welcome to PQFORCE!
This QuickStart Guide will walk you through its essential features, helping kickstart your planning process.
What can you do with PQFORCE?
PQFORCE is designed for a variety of users across different roles within your company:
Project Manager
As a project manager at PQFORCE, you are responsible for planning projects and scheduling tasks using a Gantt chart. You define the project team members and allocate their tasks. You manage the project to ensure it meets deadlines and determine whether it is active or can be closed, thereby setting its lifecycle. The most relevant views for you are:
-
Details: Manage the project's profile and initiate status transitions in the life cycle.
-
TODOs: Enter smaller tasks belonging to the project and assign them to employees.
-
Planning: Manage the project schedule in a Gantt chart and allocate employees to tasks—link TODOs within the project plan.
Department Manager
As a department manager in PQFORCE, you maintain the working time models of the employees in your department. You can periodically monitor their absences, maintain an overview of each employee's workload and prevent overloading.
The most relevant views for you are:
-
Working Time Model of an Employee: Maintain the employee's working time model for correct time availability calculation.
-
Workload and Absences of Your Department: Get an overview of the employees, their availability, and workloads.
Employee
As an employee in PQFORCE, you receive tasks in the form of "TODOs" and tasks from the project Gantt chart. To help project managers assess your progress and plan with your availability, it is crucial to record your accomplishments, working hours, and absences.
The most relevant views for you are:
-
TODOs: View the tasks ("TODOs") assigned to you or that you have created.
-
Workload and Absences of Your Resource: Get an overview of your workload and absences days.
Login
PQFORCE has two distinct user roles: Owner and Member.
Access options
Owner access
Upon subscribing and creating your system, you are automatically assigned the Owner role. As the Owner, you act as the primary administrator of your account, with full control over system settings and configurations. This role grants you the authority to manage users, define access permissions, and customize the platform to align with your organization’s requirements. Owners are responsible for overseeing user access, ensuring that permissions are correctly assigned, and maintaining the system’s overall functionality. Additionally, only users with Owner access can upgrade or downgrade the system edition as necessary.
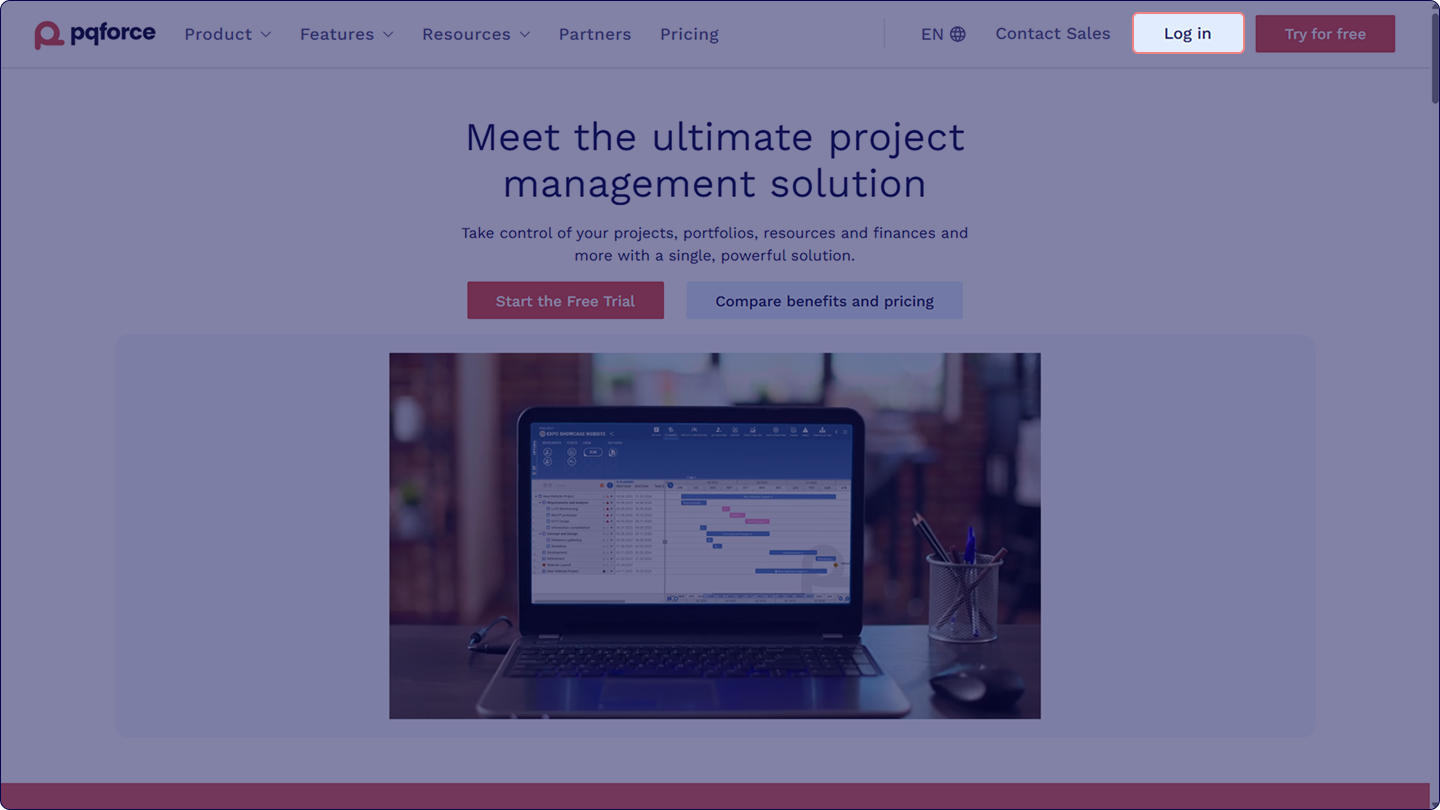
To log in as the Owner follow these steps:
- Visit the PQFORCE website at https://www.pqforce.com/en/.
- Click Login to proceed.
- You will be redirected to the login page, where you need to enter your email and password.
- After logging in, you will be taken to the Website Dashboard, which displays all your active systems. These may include subscriptions where you hold both Owner and Member roles.
- Here, you can view details for each system, including the last access date, edition, and the number of resources and projects included.
- Select the system you wish to access as the Owner and click Go to.
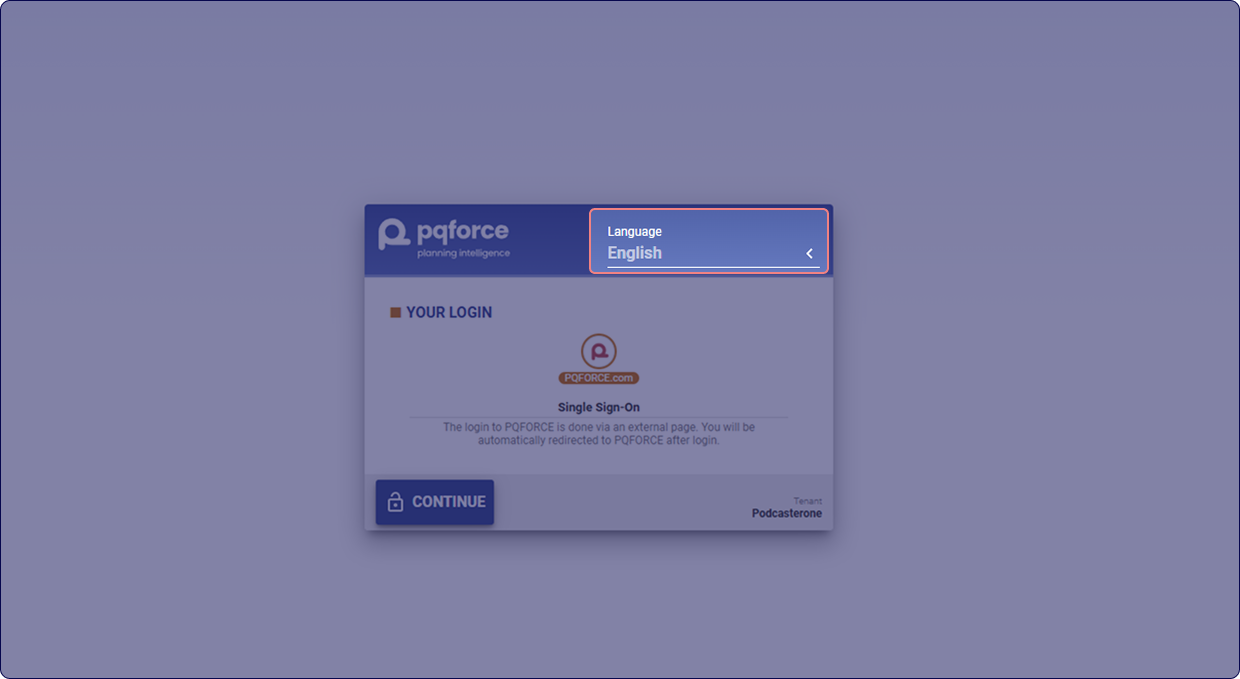
- You will be redirected to the PQFORCE login page, where you can select your preferred language and click CONTINUE to enter the system.
* For quicker access in the future, it is recommended to bookmark the PQFORCE system login page.
Member Access
A Member is a user invited by the Owner to access the PQFORCE system. Members can view and modify all objects within the system but do not have the ability to invite others. Access permissions are automatically granted based on the assigned role.
To log in as the Member, follow these steps:
- Check your email for the invitation to PQFORCE
- The email will include 2 links: a link for a new member which allows to create an account and a link to log in, in case you already have an account
To create an account, follow these steps:
- Click on the Create your account link.
- On the new page, enter your credentials, provide the email address used for your invitation, and create a password. Select your preferred language and click Continue.
- Check your email for a confirmation code.
- Click on Confirm your account or manually copy the confirmation code and return to the previous page.
- Enter the confirmation code into the empty field and click Submit.
- You will then be redirected to the Website Dashboard, where you can view all your systems. These may include subscriptions where you hold both Owner and Member roles.
- Here you can view all system details, including the last access date, edition, and the number of resources and projects included for each system.
- Select the system you want to access and click Go to.
- You will be redirected to the PQFORCE login page, where you can select your preferred language and click CONTINUE to access the system.
* For quicker access in the future, it is recommended to bookmark the PQFORCE system login page.
To log in to an existing account, follow these steps:
- Click on the Log in link in your email.
- On the login page, enter your email and password, then click Login.
- You will then be redirected to the Website Dashboard, where you can view all your systems. These may include subscriptions where you hold both Owner and Member roles.
- Here you can view all system details, including the last access date, edition, and the number of resources and projects included for each system.
- Select the system you want to access and click Go to.
- You will be redirected to the PQFORCE login page, where you can select your preferred language and click CONTINUE to access the system.
* For quicker access in the future, it is recommended to bookmark the PQFORCE system login page.
Language
To change the language, locate the language dropdown menu at the top right corner of the Login window and select your desired language from the options provided.
Password reset
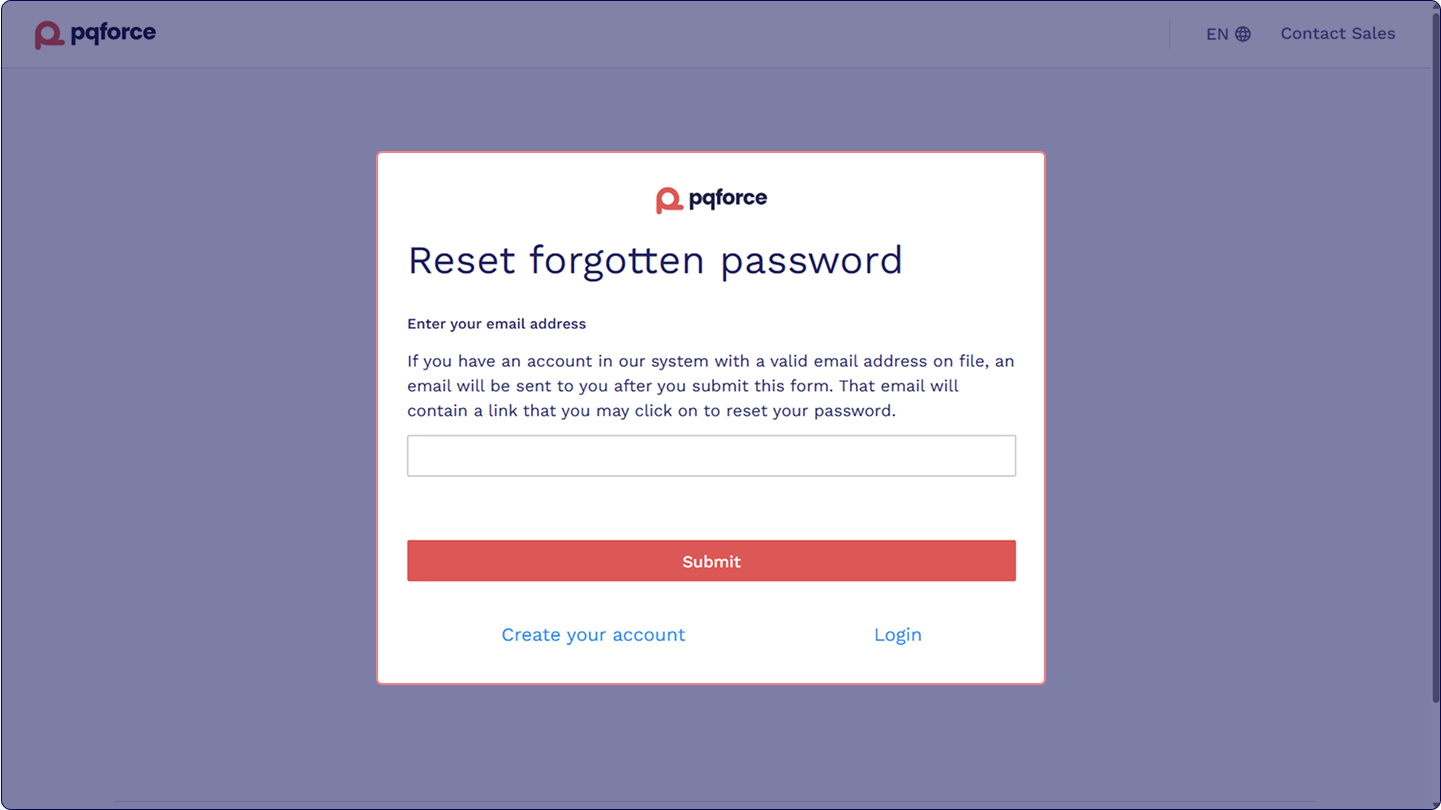
If you forgot your password, follow these steps:
- Go to the PQFORCE login page and click on Reset password
- Verify your email address and click on Get a code
- Check your email for a new verification code
- Copy and paste the code on the password reset page and click on Reset
- You'll receive another email with your username and a new password
- Return to the login page and enter your username and password from the email
- You'll be prompted to create a new password on the next page
Inside my PQFORCE
Welcome to your PQFORCE account.
User Interface
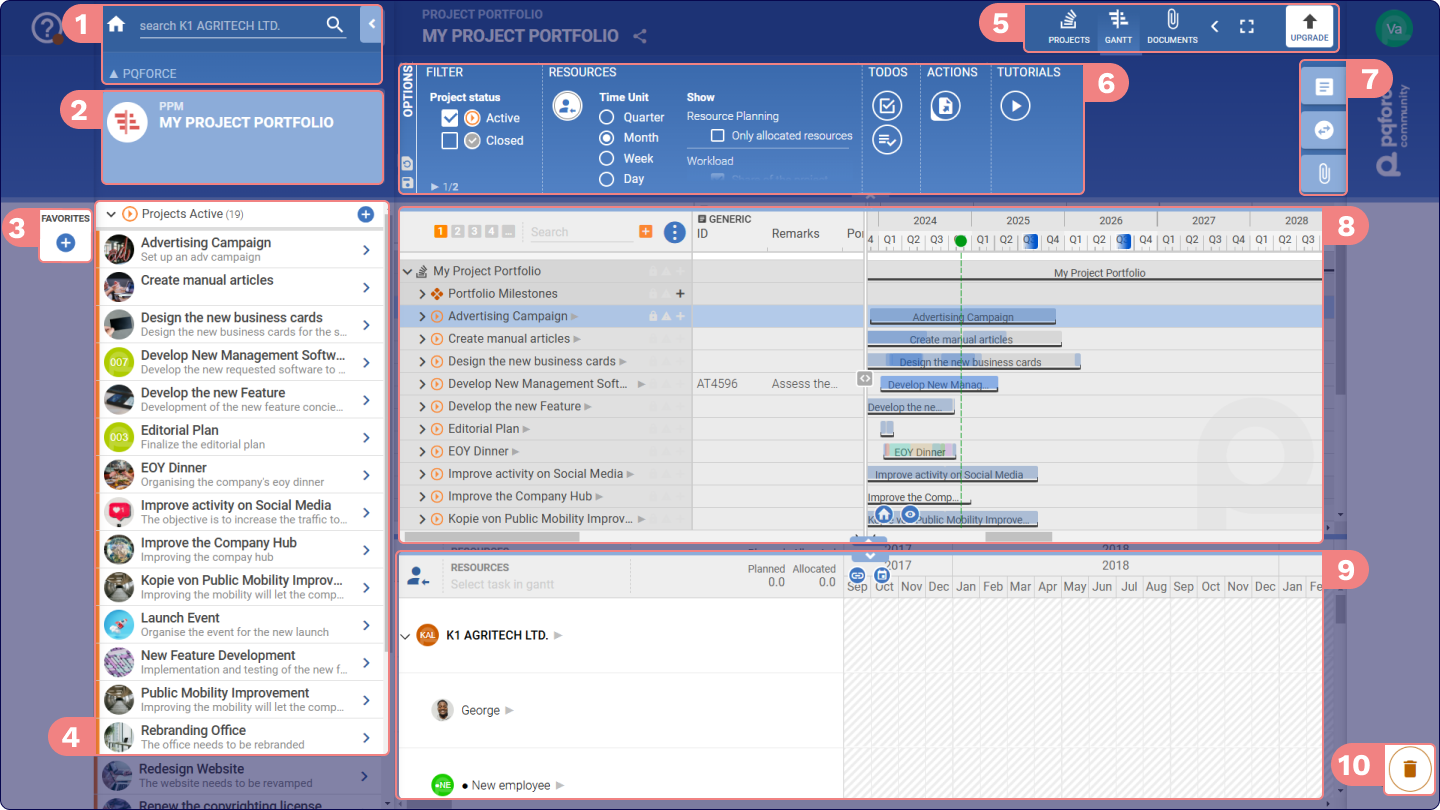
The PQFORCE interface is organized into distinct areas to enhance usability and streamline workflows:
- Control Elements: Key tools for navigation throughout the platform. 1. control elements
- Active Object: Highlights the current object with its associated details and module location.
- Favourites Bar: Save views and settings
- Navigator: Navigate through modules and objects
- Title Bar: Displays current object, its type, and module location
- Options Area: Customize information displayed in the workspace
- Side Tab: opens object details and allows direct access to editing functionalities
- Workspace: A central area for planning projects and managing data
- Recycle Bin: Delete elements by dragging them into the bin
- Secondary Workspace: Appears as an overlay in the lower half of the workspace, providing additional means to exhibit and modify data
Help Menu
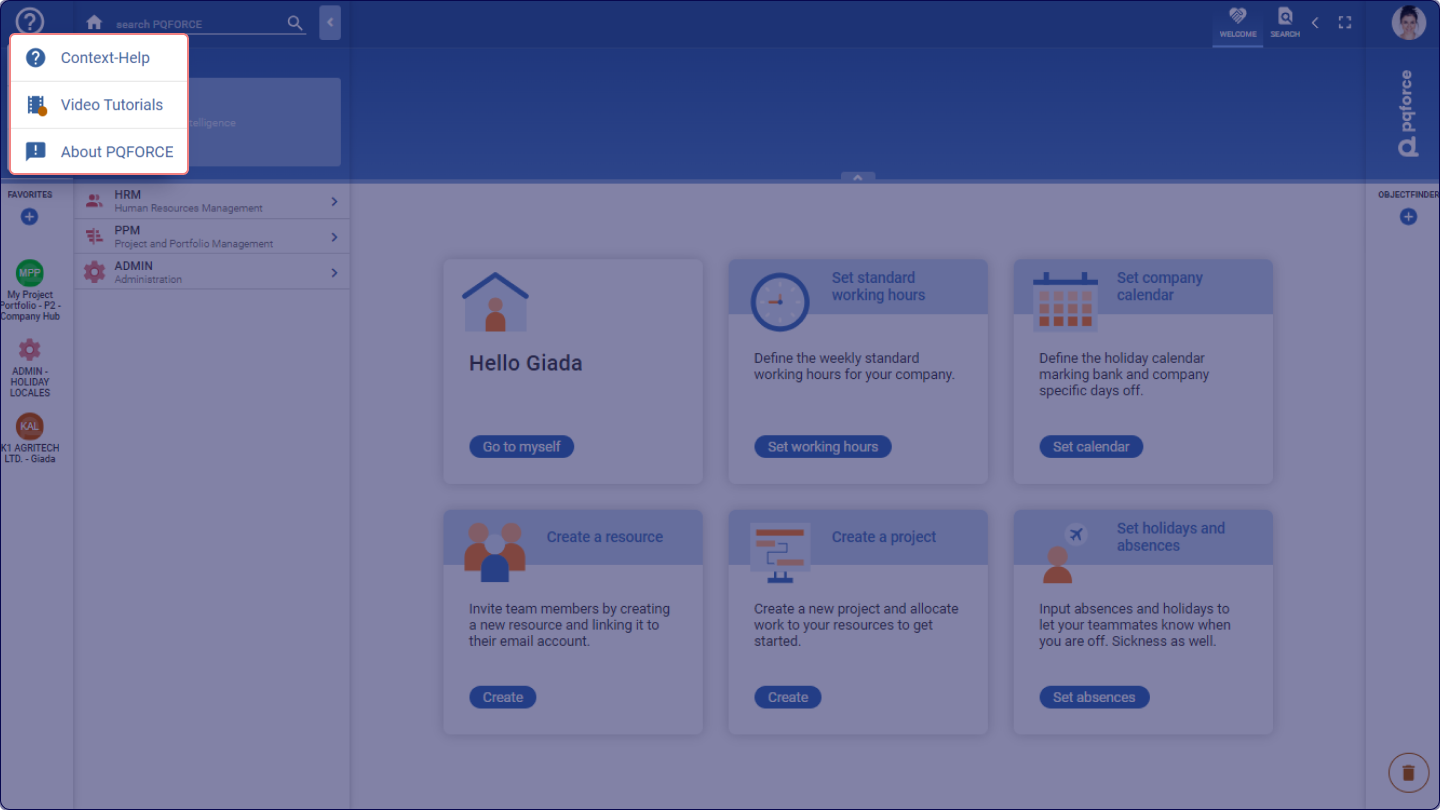
- Context Help: Find sections and their functions easily
- Video Tutorials: Learn PQFORCE step by step or search for specific topics
- About PQFORCE: Access technical details about the platform
User Menu
- Reset password or log out
- Adjust auto logout settings
System Settings in PQFORCE
To optimise PQFORCE for your company's use, it's essential to configure some system settings first. These settings can be accessed in the ADMIN module via the navigator from the main page.
Setting Time Specifications
Configuring the time specifications for your company’s Working Time Model is essential to ensure accurate availability calculations and properly displayed workload diagrams.
To configure the Time Specifications, follow these steps:
- Navigate to Settings within the ADMIN module and locate the TIME SPECIFICATIONS section.
- Define the standard working hours and the number of workdays per week, which serves as the foundation for all effort calculations.
- Specify the default unit for effort display to ensure consistency across workload diagrams.
Configuring the Holiday Calendar
Set up your company's holiday calendar to track employee availability and effectively manage absences.
To configure your company's holiday calendar, follow these steps:
- Access the ADMIN module
- Open the HOLIDAY CALENDAR view, and mark desired holidays and half-days. PQFORCE recognises these days as non-working days for all employees, ensuring accurate availability tracking.
All employees are considered absent on holidays, reducing their availability to 0 hours.
Resource management
What is a Resource?
In PQFORCE, a Resource is anything with limited availability that can be scheduled for work. It can be a department, an employee or a team. Resources have defined working hours, tasks, and workloads, and you can monitor their schedules, tasks, and project assignments.
What is a department?
A department acts as a container for employee resources, facilitating the organisation and management of workforce allocations. Each department can house multiple employees and be subdivided into sub-departments. They can be assigned to projects and possess availability and workload metrics derived from the employees within the department.
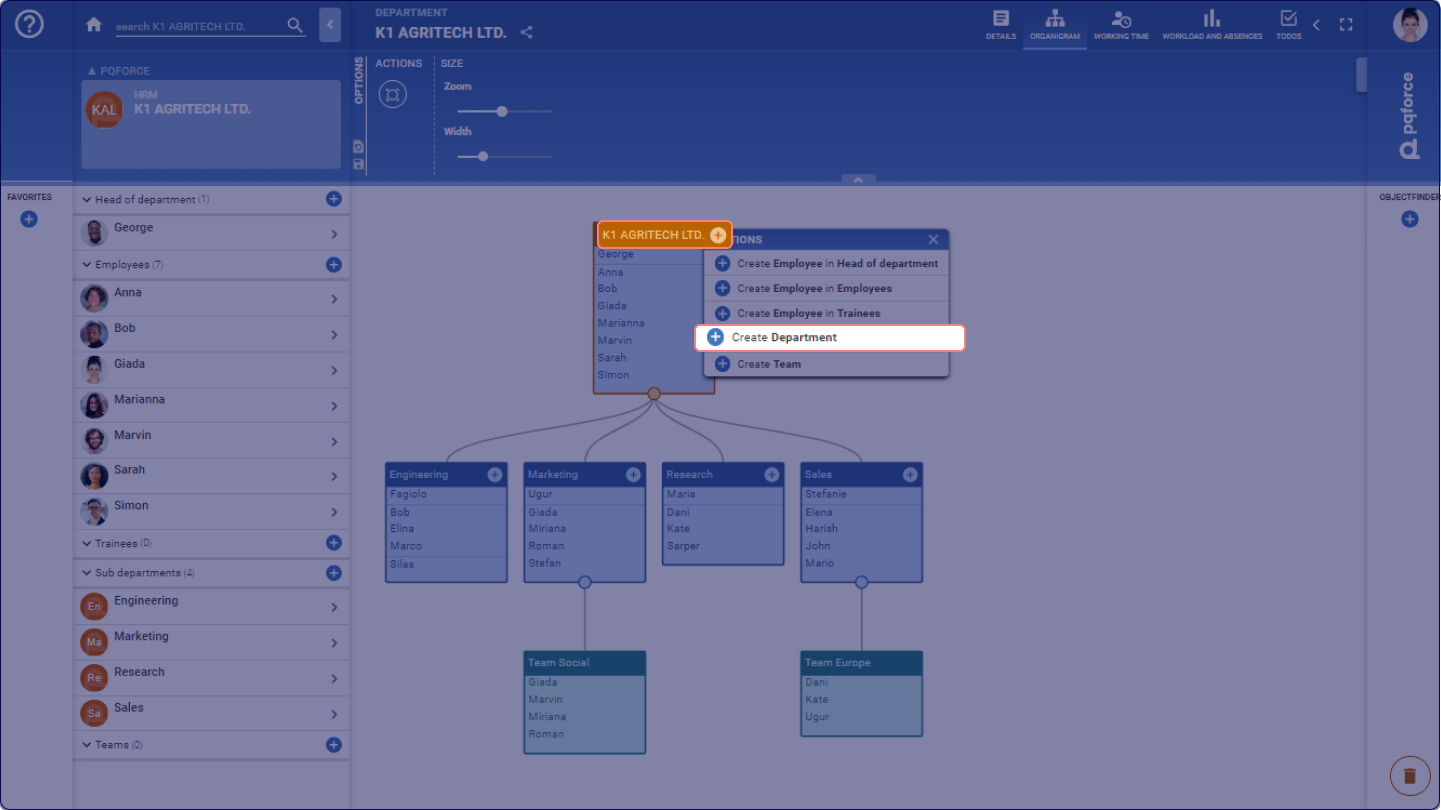
To create new departments, follow these steps:
- Navigate to your HRM module.
- Access the ORGANIGRAM view.
- Click the plus button in the Navigator or directly within the organisation chart.
- When adding departments, they are automatically placed under the department in which they are created, forming a hierarchical structure.
- Rename departments by clicking on them and editing the name in the side tab. You can also utilise drag-and-drop functionality to move departments within the chart.
- To remove a department, drag and drop it onto the trash can icon at the screen's bottom right corner.
What is an Employee?
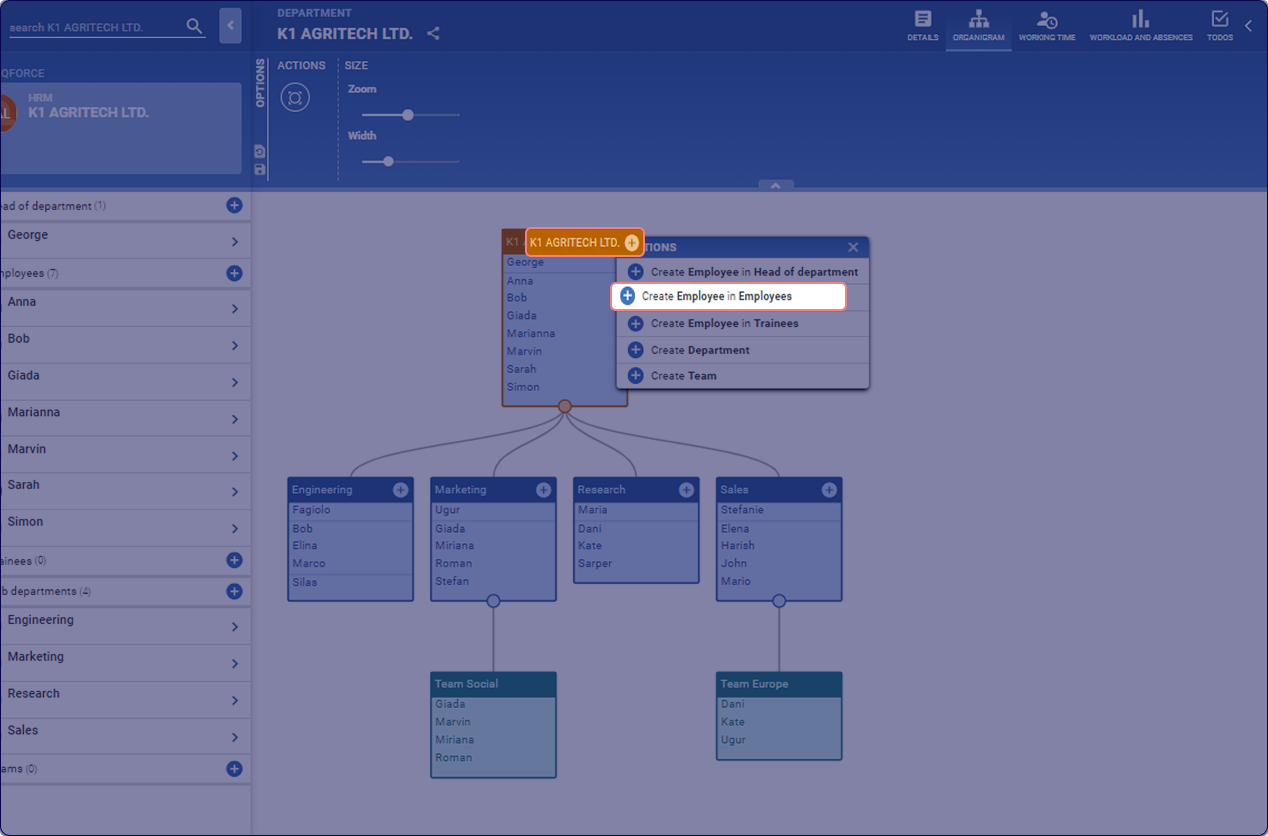
Employees represent real individuals within your company, each belonging to a specific department, forming a unique place in your organisational chart. Initially, employees have availability, subject to changes due to holidays and absences. They can be assigned to projects, with their workload adjusted based on availability.
To create new employees, follow these steps:
- Similarly to departments, new employee profiles can be generated by clicking the plus button within the ORGANIGRAM view or in the Navigator.
- Customise employee details such as image, name, position, and other relevant information in the side tab.
- Adjust employee availability and workload by accessing each employee's WORKING TIME MODEL view.
- Here, you can define specific working hours and schedules tailored to individual employees' roles and responsibilities within the company.
What is a Team?
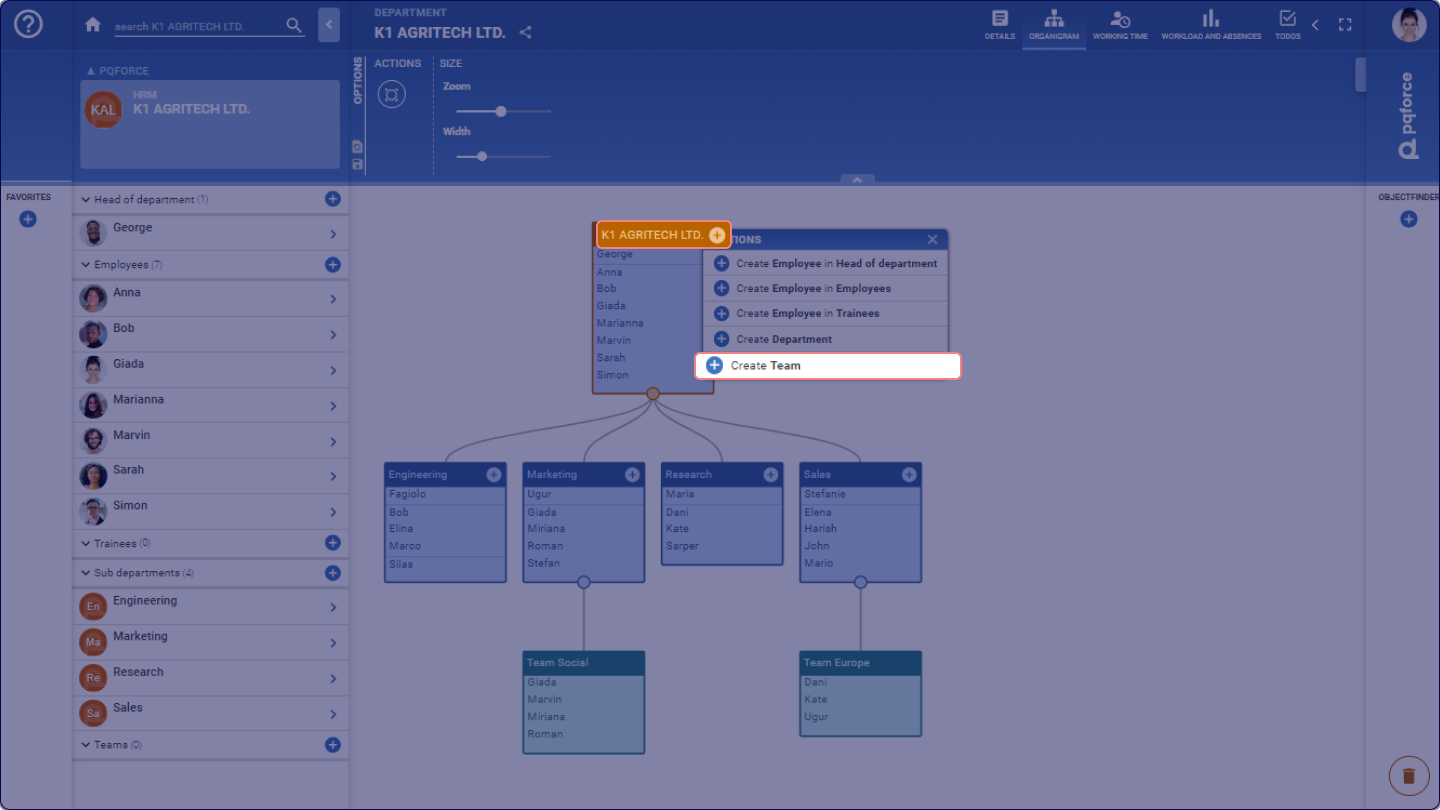
A team is a group formed from resources already existing within the system. While each resource is unique within the department tree, it can be assigned to multiple teams, enabling flexible organisation, such as task forces dedicated to specific projects.
To create new teams, follow these steps:
- Access the ORGANIGRAM view.
- Click the plus button in the Navigator or directly within the organisation chart.
- Add a name and description for your team.
- Similar to departments, new teams are placed under the parent department, forming a hierarchical structure.
- Use drag-and-drop to move teams within the chart.
- Remove teams by dragging and dropping them onto the trash can icon at the bottom right corner.
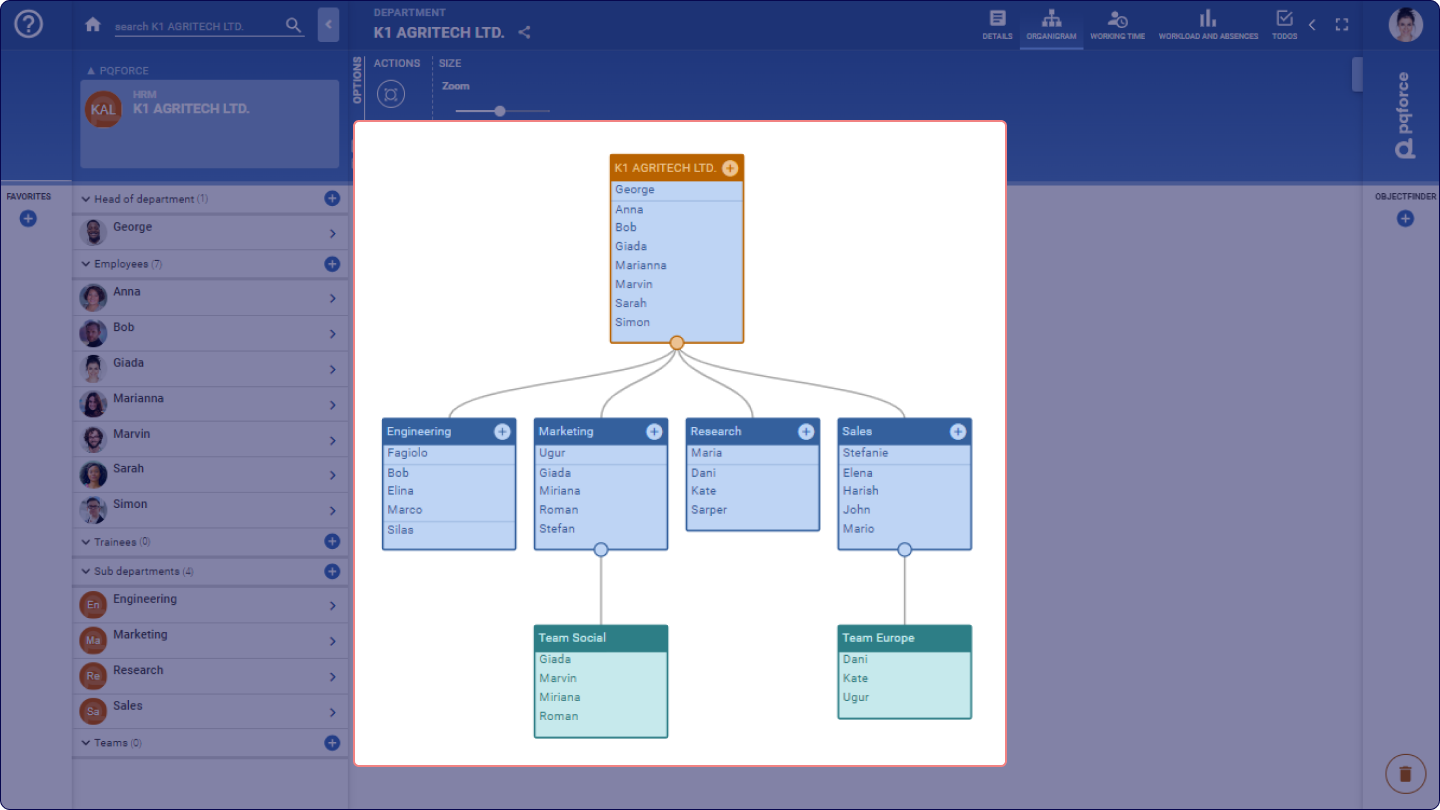
Mapping Organisation Chart
The organisation chart is structured hierarchically, representing departments and teams containing employees.
To map your organisation chart, follow these steps:
- Access the main page of PQFORCE.
- Go to the HRM (Human Resource Management) module.
- Once inside, locate and open the ORGANIGRAM view, the foundation for mapping your company's organisational chart.
- First, you'll find one department representing the top level of your company. You can add additional departments, sub-departments, teams, and employees from there.
- Use drag and drop to move resources within the chart.
- Delete your resources by dragging and dropping them onto the trash can icon.
Assigning Logins for your employees
Once you have created the system account and been granted the Owner role, you can invite other employees to join PQFORCE, enabling each employee to have their profile.
To assign logins to your employees, follow these steps:
- Create an employee profile, then navigate to the DETAILS view.
- Enter the employee's email address.
- Click on Invite as a member to generate a user login associated with the employee's email address.
- Upon confirmation, the employee will receive an email, allowing them access to PQFORCE.
Setting Working Time Model
It is essential to set up the working time model for your resources to calculate their time availability.
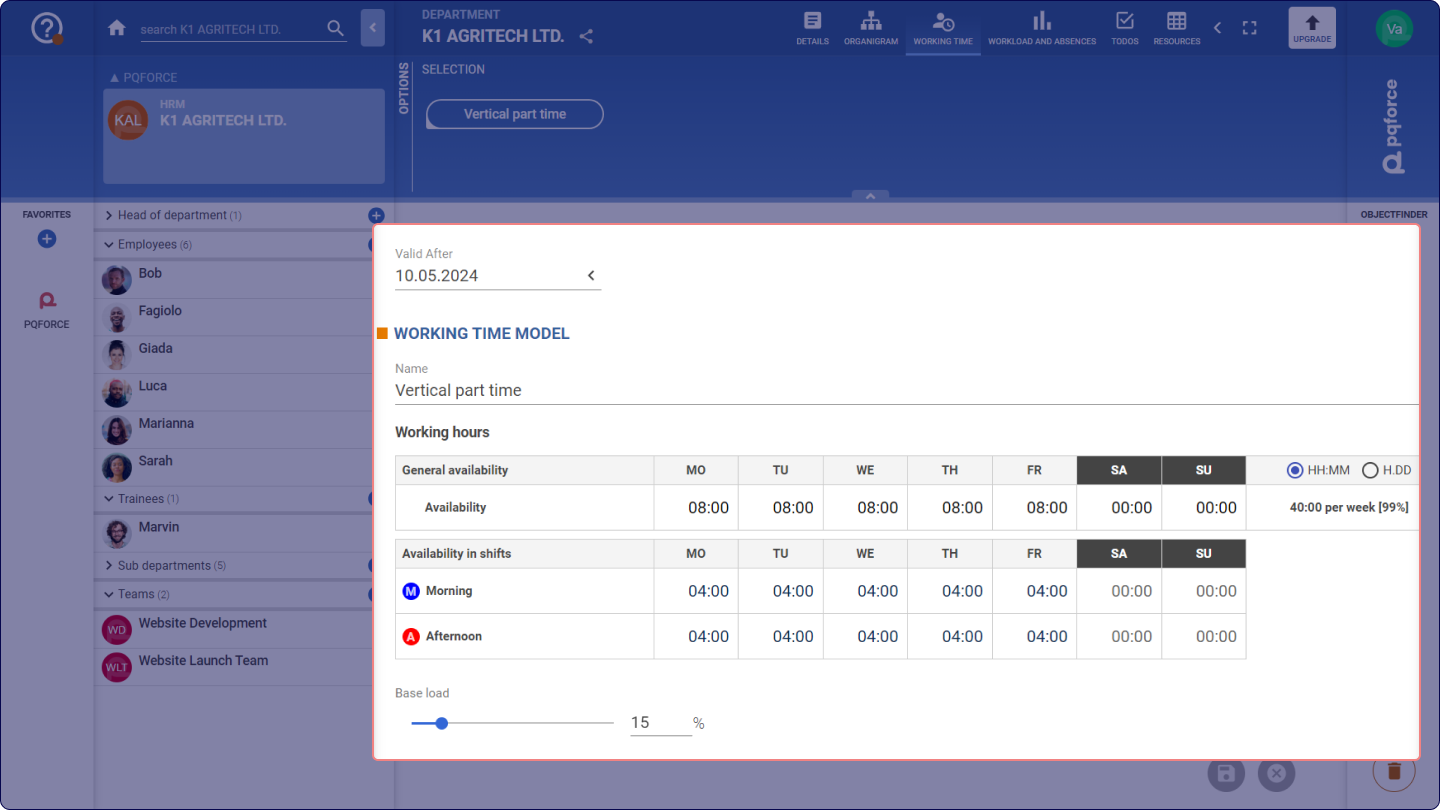
To set up the working time for a selected resource, follow these steps:
- In the HRM module, navigate to the WORKING TIME MODEL view of the selected resource.
- Check the "Inherit working time model from parent object" checkbox to adopt the standard model set by the parent resource.
- Uncheck the box to define a custom model.
- Specify the availability for morning and afternoon shifts in the provided table, ensuring it aligns with the standard set in the ADMIN module.
Project creation and management
What is a project?
A project encompasses time-limited activities with goals and approaches and a schedule detailing planning data, effort, and progress values. PQFORCE facilitates resource allocations for projects, allowing for planning and tracking of resources.
Within the workspace, the project view presents projects in a table format, with each project represented as a row and its properties organised as columns. Each column allows for the sorting and filtering of information in the workspace.
- Click on a column heading to organise projects based on the column's information in ascending order, with repeated clicks toggling the order
- Use the OPTIONS area to access detailed information about your project
To create projects in PQFORCE, follow these steps:
- Please navigate to the PPM Module from the start page and open MY PROJECT PORTFOLIO.
- In the NAVIGATOR area, click the plus button to create a new project.
- In the DETAILS view of the project, you can customise the name, description, and other attributes.
- Click on Apply to confirm any changes made.
Project planning
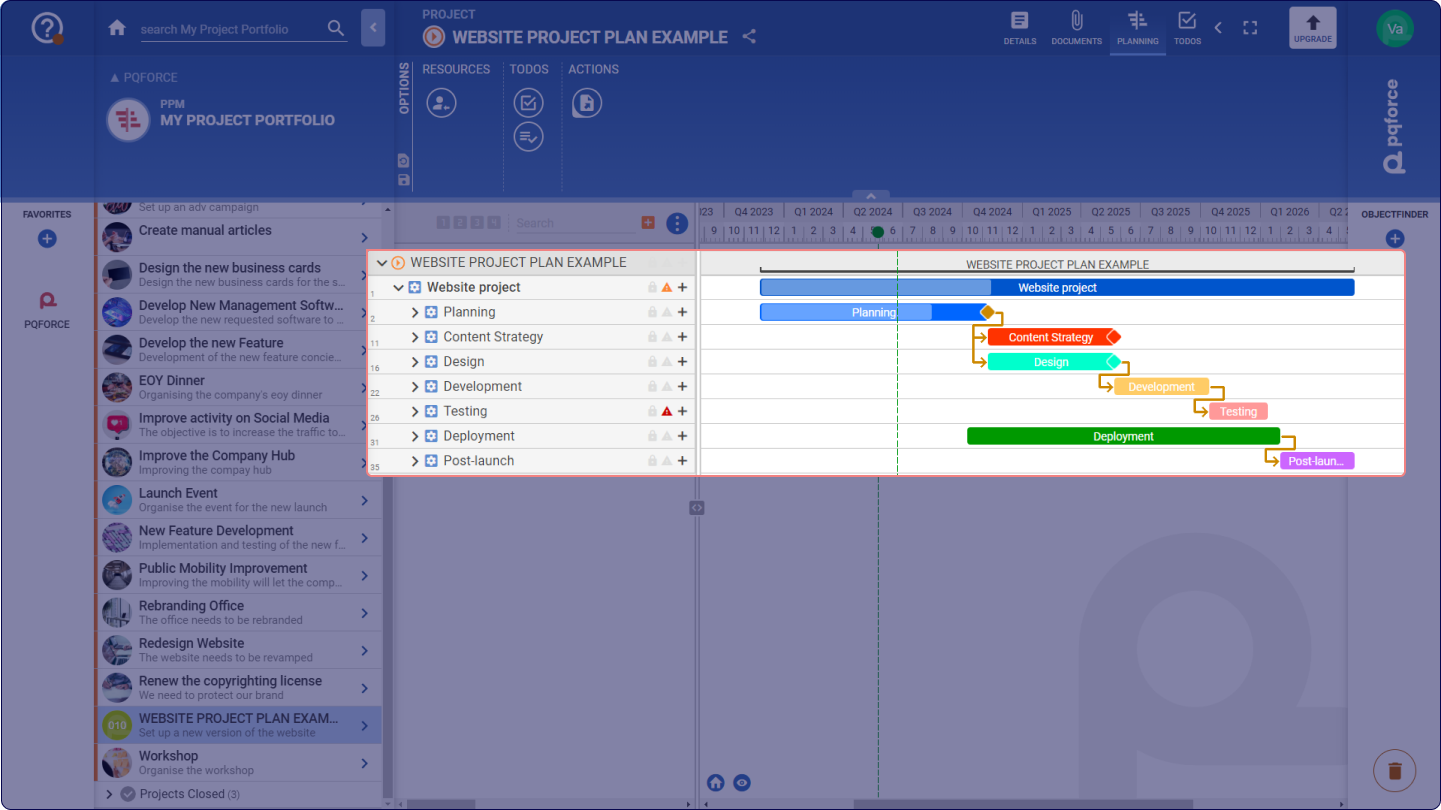
To plan a project, follow these steps:
- Customise your display according to your preferences by clicking on the three dots icon at the top of the table and modifying column visualization and movement settings for the elements on the Gantt chart.
- Create tasks, milestones, and folders by clicking on the plus icon.
- Use the Gantt chart to move tasks and milestones vertically and horizontally.
- Adjust task duration and start and finish dates by changing the size and position of bars in the Gantt chart.
- Create task dependencies by clicking on bar icons and dragging arrows.
- Use drag-and-drop options to create and change the hierarchy of your tasks.
- Use Side Tabs to review and edit details.
- Track project progress by comparing planned and actual dates.
Project deletion, restoration and back up
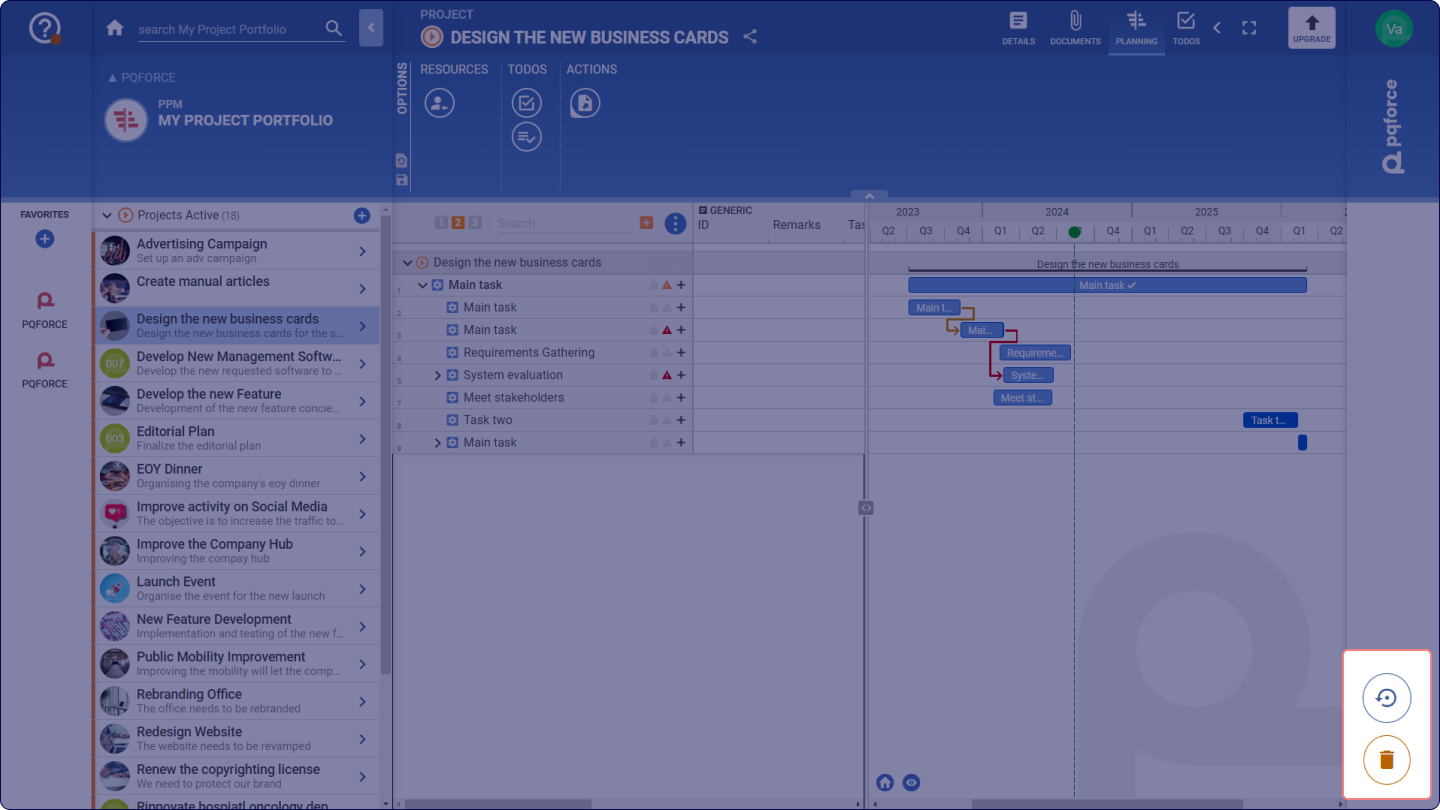
- To delete your projects and tasks drag and drop elements into the Trash Bin. You have 30 days from the project’s deletion to restore the project.
- To restore deleted elements, click on the Trash Bin and select a project you wish to restore.
- To back up your projects and free up subscription slots use drag and drop option and move the projects into the spinning wheel icon in the bottom right. Click on OK to download the Zip file of your project.
- To restore the backed-up project, drag the saved Zip file from your computer into the spinning wheel icon.
Resource allocation
With PQFORCE, you can plan projects and tasks and assign them to your resources.
To allocate your projects to resources, follow these steps:
- Click on the desired task.
- In the side tab, click on Allocations or press F2.
- From the drop-down menu, choose a resource you want to allocate for work. You can allocate multiple resources to one task and indicate the allocation value for each resource.
- Indicate the number of hours to be dedicated to this task by the selected resource.
Alternatively:
- Click on "Plan resources" in the OPTIONS area.
- Choose and allocate resources from the entire organization chart in the workload diagram.
- Indicate the desired effort quantity and check the charts for resource availability.
- View the workloads and utilization of resources in real-time.
Within the PROGRESS side tab, you can choose the time unit and evaluate the progress of the task.
TODO Management
TODOs in PQFORCE are actionable steps attached to activities, serving as mini-tasks for projects or stand-alone assignments. They can be assigned to resources, planned with deadlines, and organised into lists or Kanban boards.
Creating a TODO
To create a TODO, follow these steps:
-
In the Kanban Board's "New status" column, click the Plus button in any row
-
The new TODO is created and assigned to the employee who created it
-
Modify assignations in the Relations section of the side tab
Editing TODOs in the Kanban board view
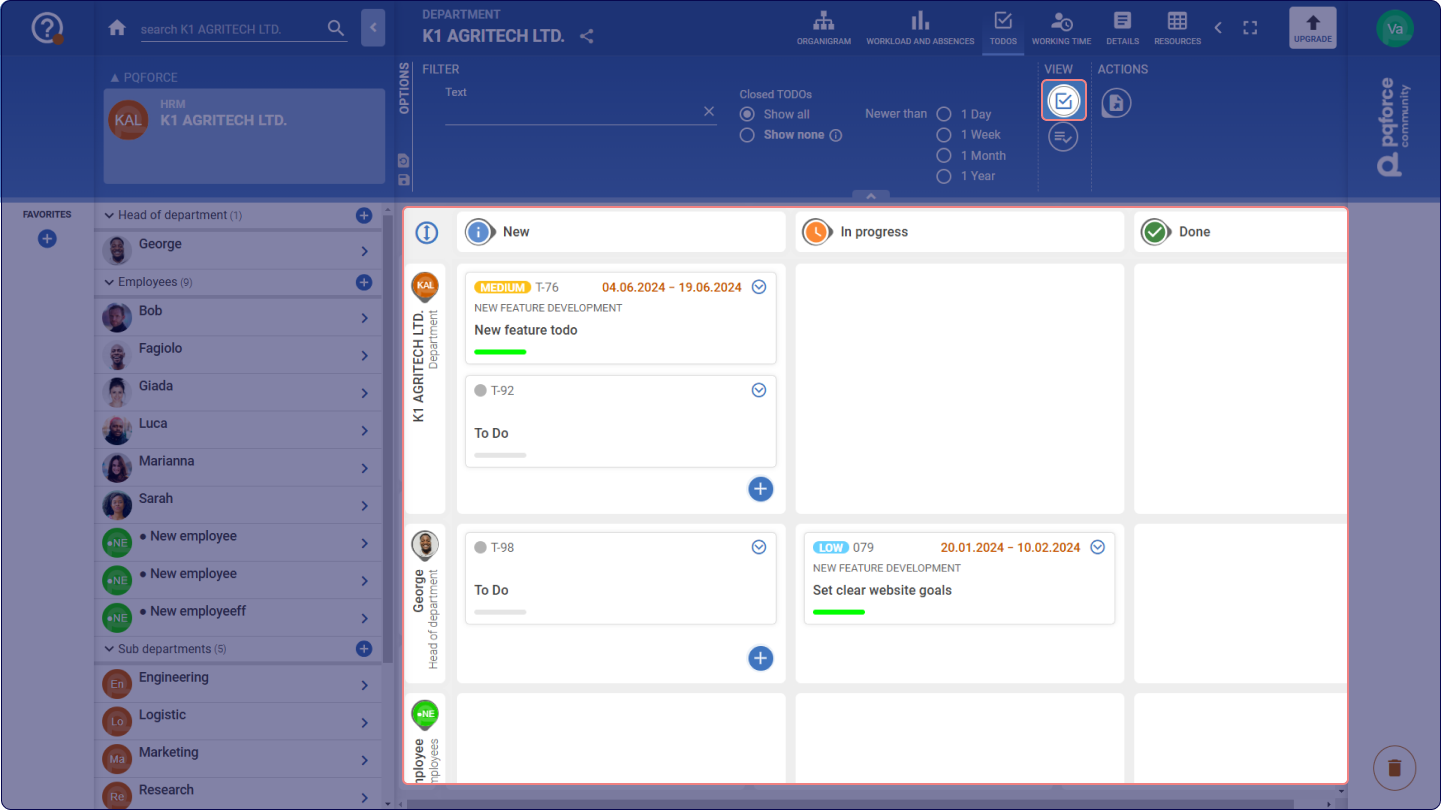
To edit your TODOs in the Kanban board view, follow these steps:
- Expand with the arrow button to view the description and recent comments.
- Use the priority badge to select the priority value of a TODO
- Move by dragging and dropping within or between columns.
- Copy by dragging onto the plus button, creating one or multiple copies.
- Delete by dragging it into the Trash Bin, deleting the entire TODO or its relation.
- Edit multiple TODOs simultaneously by selecting them with CTRL or SHIFT keys.
Editing TODOs in the List View
To edit your TODOs in the List view, follow these steps:
- Customise display with sorting and filtering options.
- Create new TODOs at the bottom left of the workspace.
- Copy TODOs by dragging and dropping onto the plus button.
- Delete TODOs by dragging and dropping them onto the trash bin icon.
- Edit multiple TODOs simultaneously by selecting them with CTRL or SHIFT keys.